


 03-11-2018, 05:44 AM |
#71 |
|
Senior Member

Join Date: Jul 2016
Drives: BRZ, WRX
Location: Sydney, Australia
Posts: 292
Thanks: 105
Thanked 970 Times in 234 Posts
Mentioned: 2 Post(s)
|
I spent today making some small gussets to attach the roll cage to the chassis and stiffen the overall structure.
Using CAD as they call it on Project Binky, the photos tell the story. 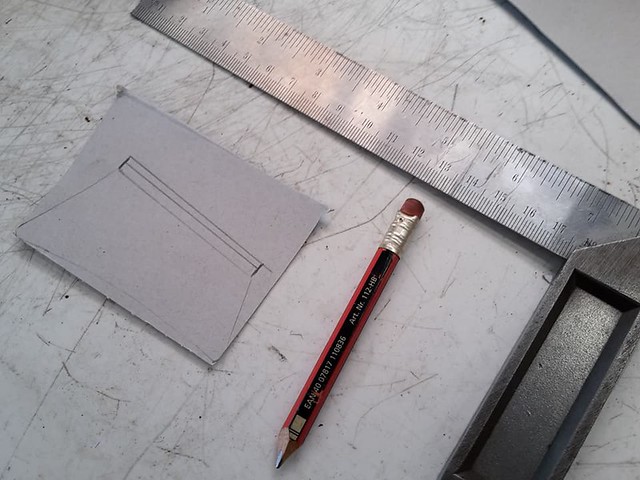 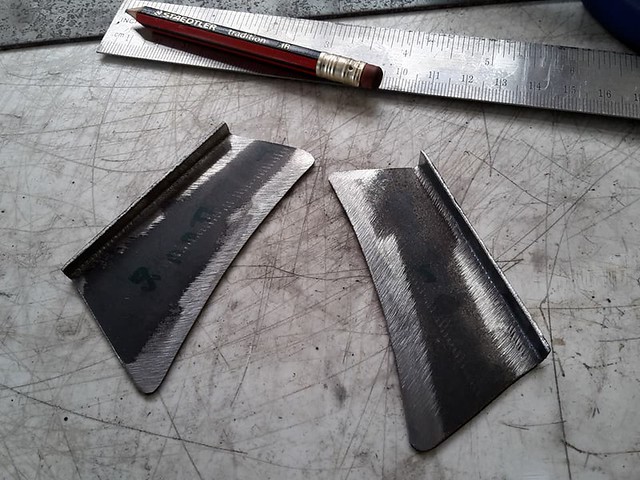 This is all the gussets I made, painted with weld-through primer on the back side only. There is 4 on the main hoop, 2 each side and another 2 for the lateral bars near the top corner of the windscreen. 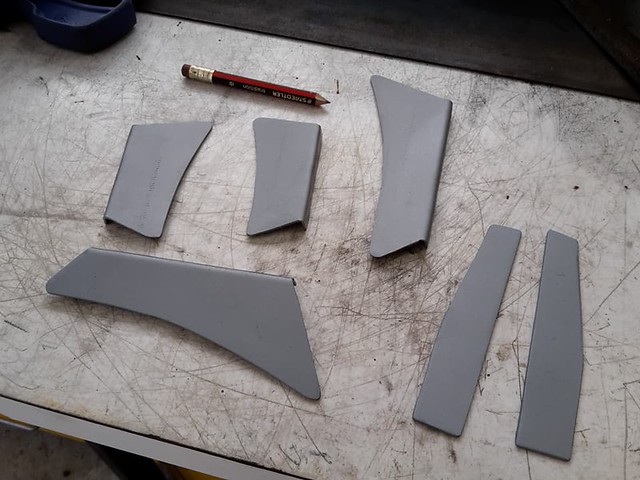 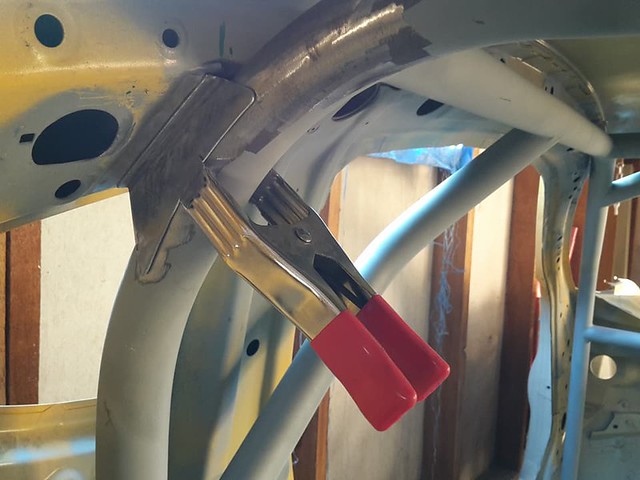 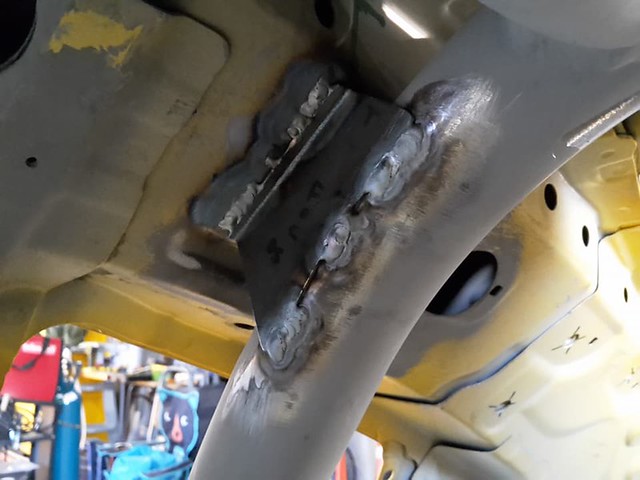 I got the main hoop done but ran out of time for the other 2 gussets at the front. Basically there is a gusset on either side of the hoop. 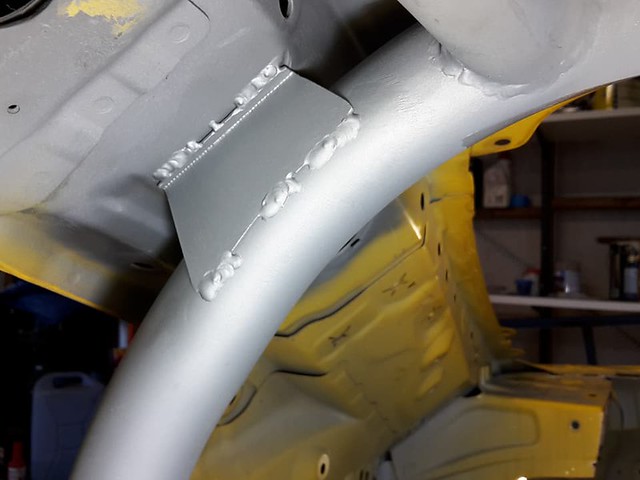 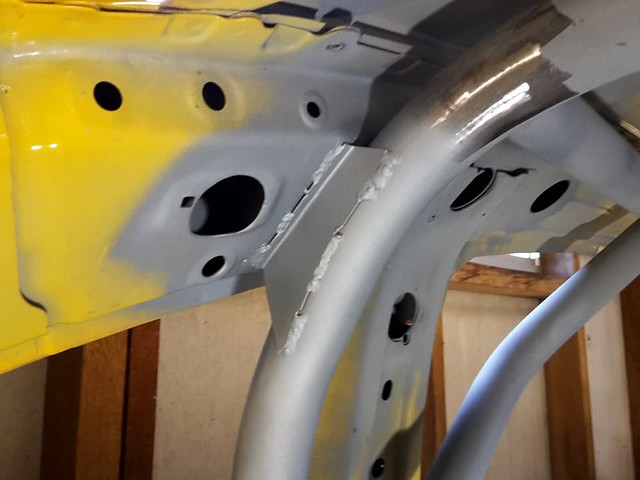
|

|

|
|
03-25-2018, 06:19 AM
|
#72 |
|
Senior Member
Join Date: Jul 2016
Drives: BRZ, WRX
Location: Sydney, Australia
Posts: 292
Thanks: 105
Thanked 970 Times in 234 Posts
Mentioned: 2 Post(s)
|
Hey guys, I finally got some work done on the car this weekend, last weekend I was sick so nothing got done.
I'm really happy with how things are going now, today I finished attaching those brackets I made to join the roll cage to the chassis. Front of the car just above the windscreen on each side. 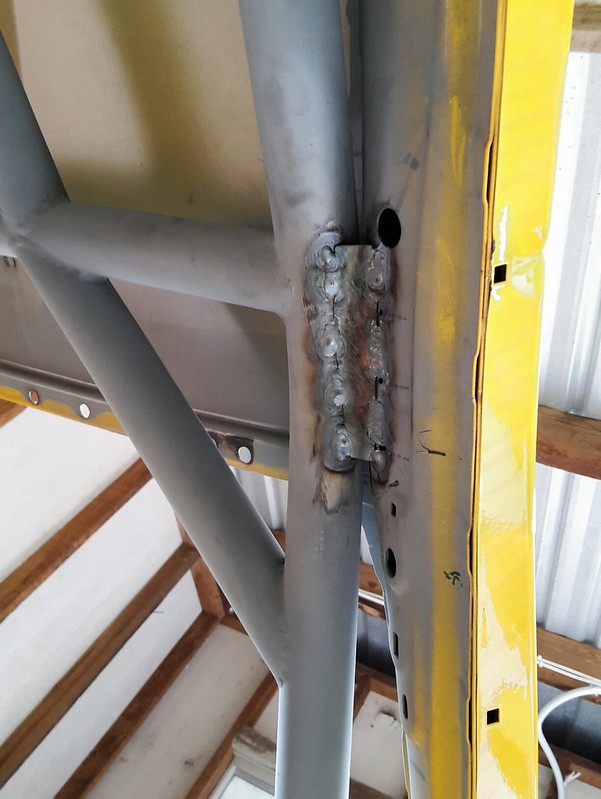 Primed. 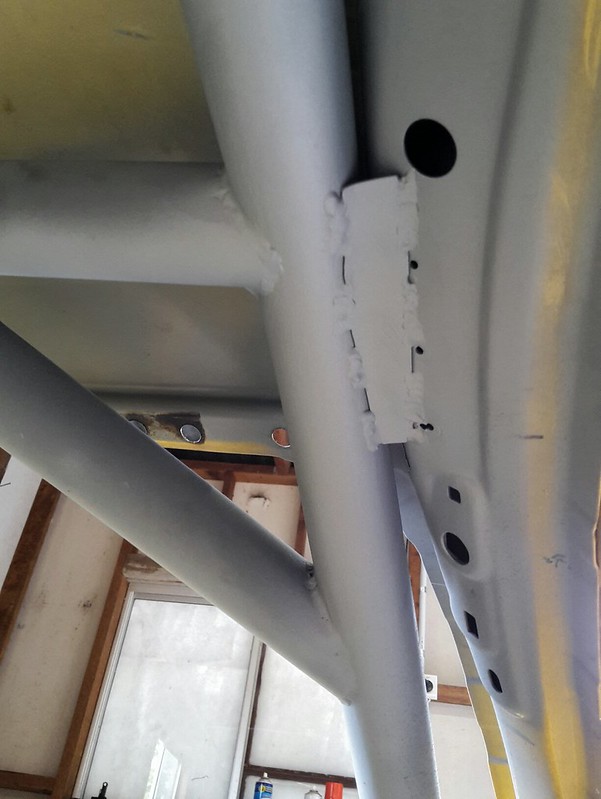 Then I proceeded to removing the roof skin. It was pretty easy with a spot weld removal drill bit. 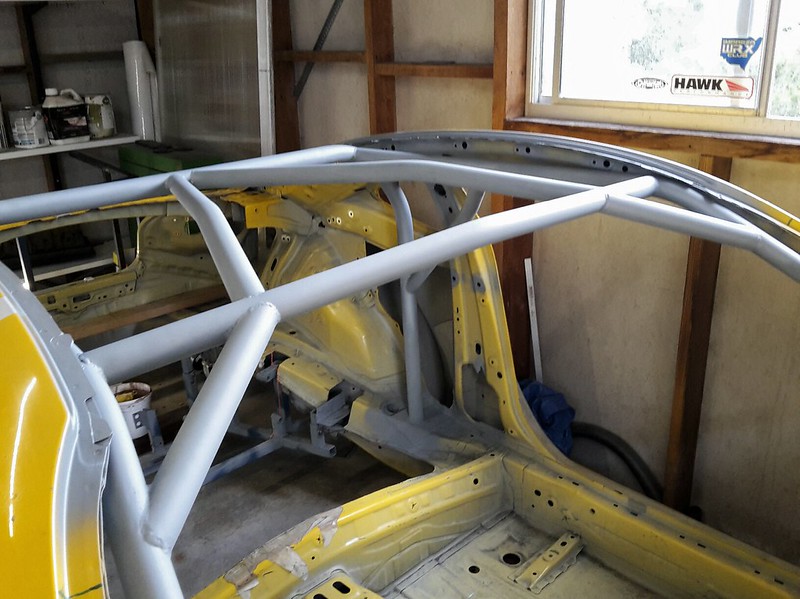 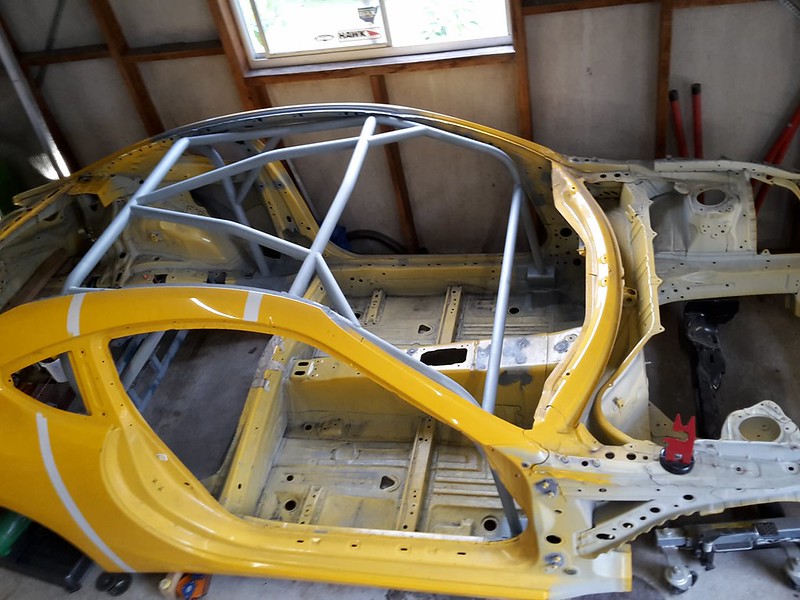 So the rear suspension jig has been removed from the car and is now on the bench ready for me to start fabrication of the rear cradle. I'm excited and also a little nervous to start this! 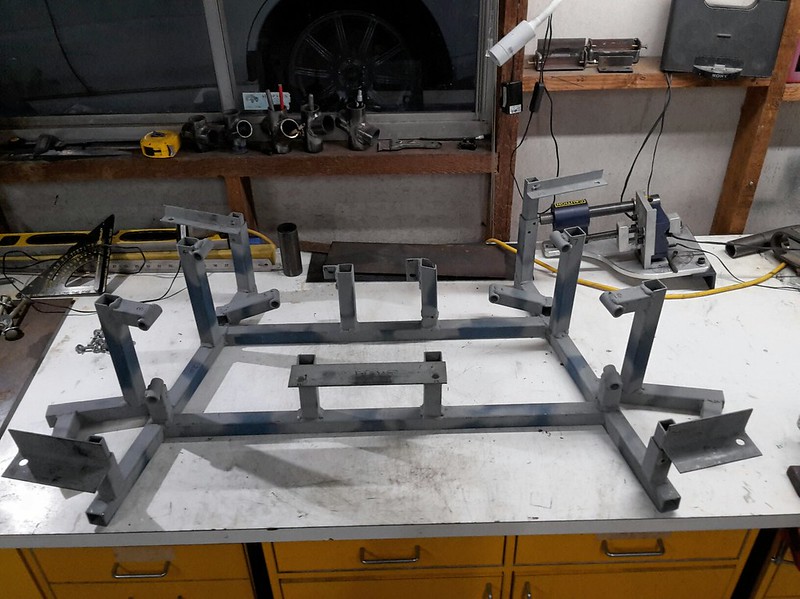
|
|
|
|
|
03-27-2018, 06:14 AM
|
#73 |
|
Senior Member
Join Date: Jul 2016
Drives: BRZ, WRX
Location: Sydney, Australia
Posts: 292
Thanks: 105
Thanked 970 Times in 234 Posts
Mentioned: 2 Post(s)
|
Hey guys, I took today off work to get some things done on the car. I ended up spending most of the day going through my notes on the rear suspension and ride heights, trying to remember how I was going to mount the welding jig in the car so the chassis would be lowered without screwing up the geometry.
I started by designing the tabs from which all the control arms will attach. I have decided to go with 3 different heights which will change the geometry depending on the ride height I choose. 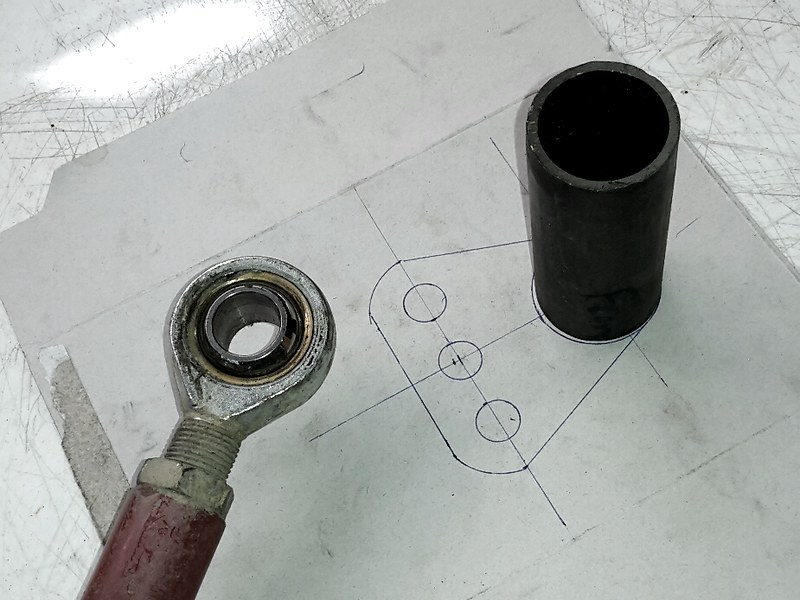 Looking at the chassis rail where the stock rear cradle usually mounts I have cut away the metal so I can mount my welding jig on top of the mounting point. Every millimeter I mount above this point is how much the chassis will drop by. The crush tube with captive nut in the rail is 44mm thick so my baseline chassis drop is 44mm, this will be the ride height correction of the middle hole in my tabs. 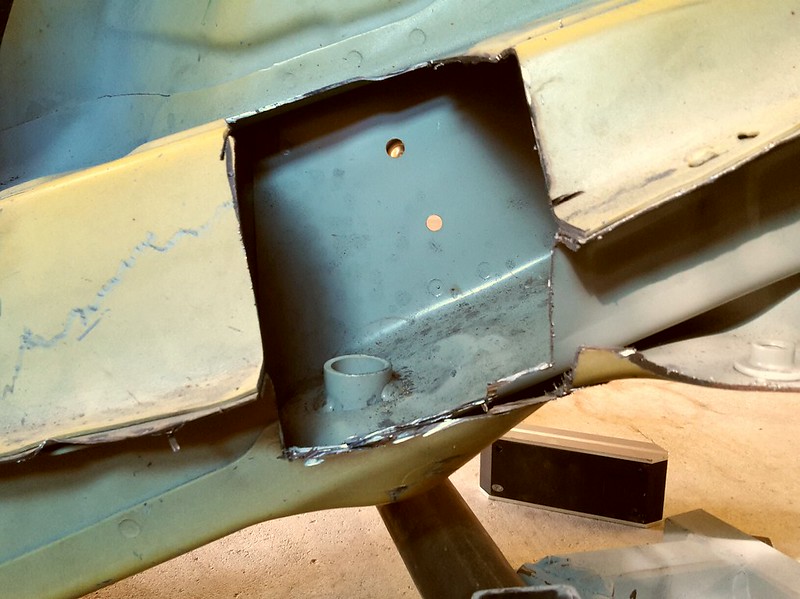 So I then put the jig back in the car to try and work out how the lower tube will pick up the trailing arm that attaches just forward of the wheel well. 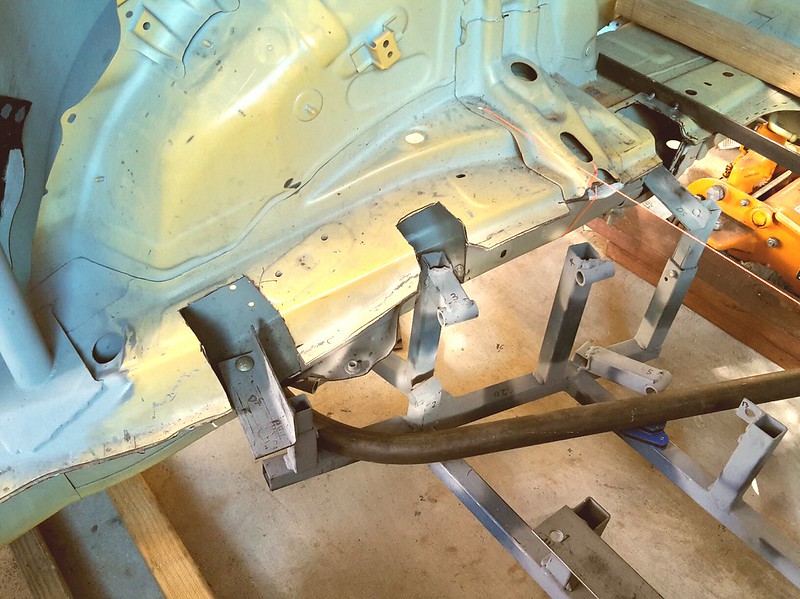 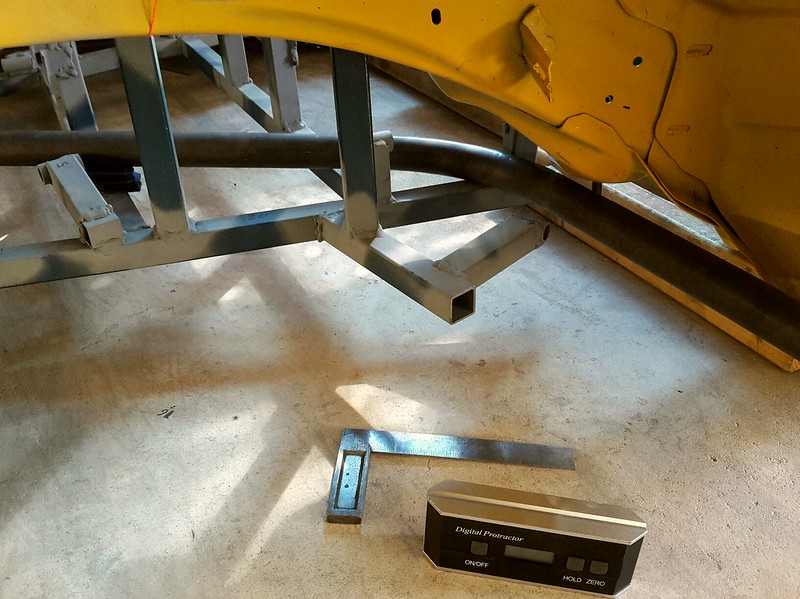 The bent tube in photo was just part of the roll cage I bent incorrectly but it gave me an idea of how a bend in the tube would work really well to pick up that trailing arm attachment point. I think once I actually start joining tubes this structure will come together very quickly but right now I need to do a lot of thinking, measuring etc. before I start cutting up materials. |
|
|
|
|
03-27-2018, 06:23 PM
|
#74 |
|
Senior Member

Join Date: Nov 2012
Drives: 2015 BRZ Limited
Location: Bay Area, CA
Posts: 484
Thanks: 613
Thanked 269 Times in 181 Posts
Mentioned: 13 Post(s)
|
Great progress! Are you planning to modify the front suspension pickup points to balance out the rear chassis drop? Or will that not matter for what your building the car for?
__________________
|
|
|
|
|
03-27-2018, 09:44 PM
|
#75 | |
|
Senior Member
Join Date: Jul 2016
Drives: BRZ, WRX
Location: Sydney, Australia
Posts: 292
Thanks: 105
Thanked 970 Times in 234 Posts
Mentioned: 2 Post(s)
|
Quote:
I have not put a lot of thought into it yet but the rough plan is to move the inner mounting points of the front control arms up and ideally have the same 3 bolt hole locations as I have relative to the rear tabs. The front crossmember will be a custom tubular structure so moving the mounting points should not be too difficult. Some consideration will need to be made for the steering rack mounting. I can't really do much with the front end until I buy a motor and gearbox which is what I plan to do as soon as I have finished the rear suspension. |
|
|
|
|
|
03-30-2018, 05:32 AM
|
#76 |
|
Senior Member
Join Date: Jul 2016
Drives: BRZ, WRX
Location: Sydney, Australia
Posts: 292
Thanks: 105
Thanked 970 Times in 234 Posts
Mentioned: 2 Post(s)
|
I got a little work done this afternoon, I'm working on the bottom level of tubes in the rear suspension cradle as a foundation to build upward on.
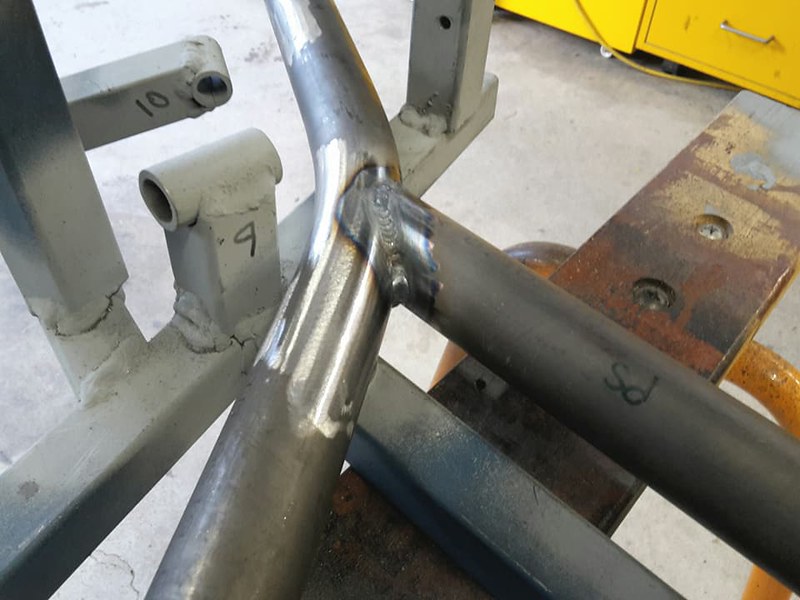
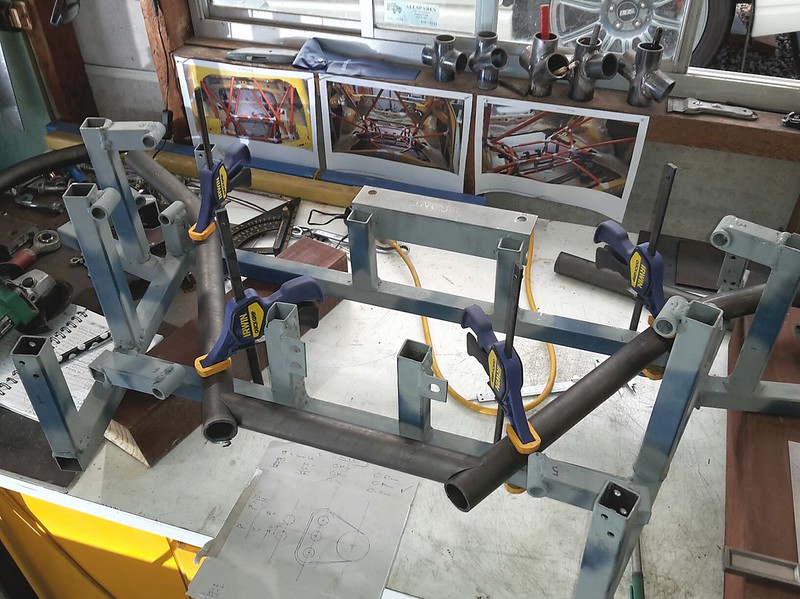 I used a 29 degree bend to bring the tube around and parallel to the trailing arm pivot point. 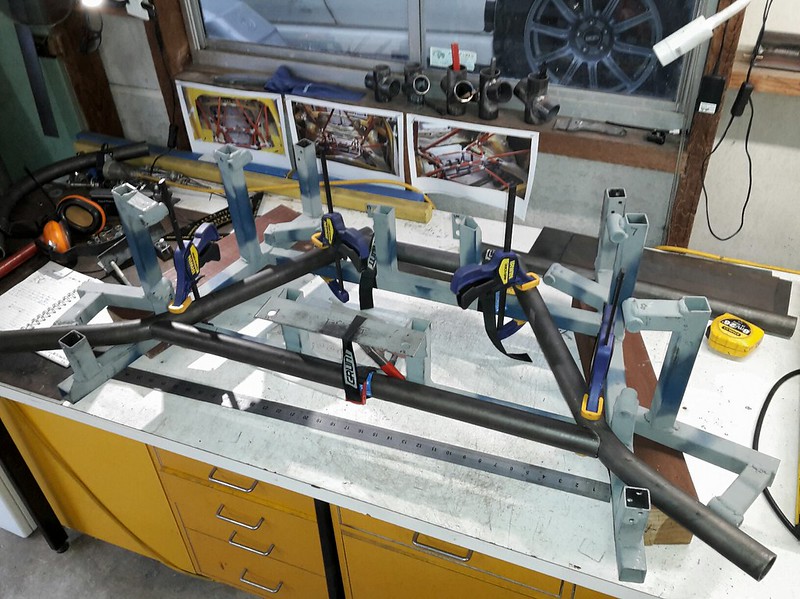 I'm hoping to get a bit more done this long weekend but that's all for today. |
|
|
|
|
03-31-2018, 04:46 AM
|
#77 |
|
Senior Member
Join Date: Jul 2016
Drives: BRZ, WRX
Location: Sydney, Australia
Posts: 292
Thanks: 105
Thanked 970 Times in 234 Posts
Mentioned: 2 Post(s)
|
Got a little more time on the car after lunch today. The base layer is complete and welded up. I'm very happy with how its going and I'm really enjoying welding comfortably on a bench again rather than cramped up inside a car.
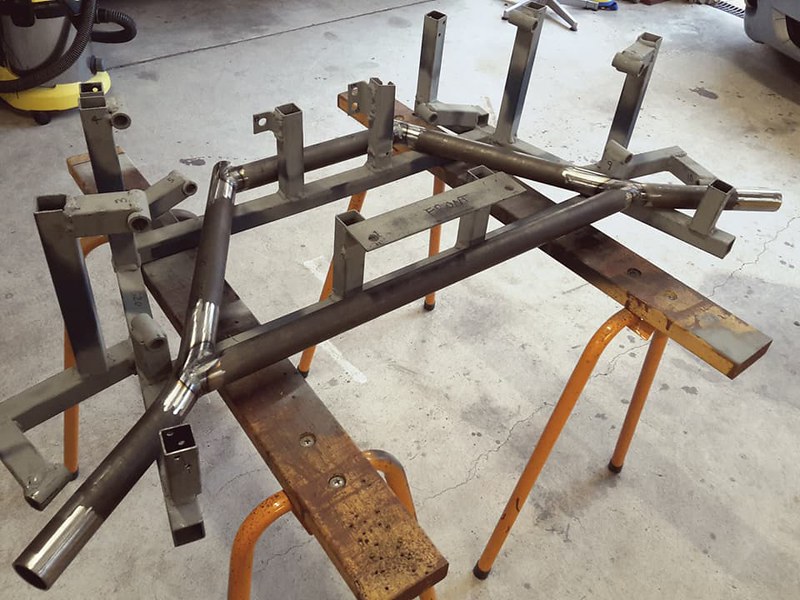 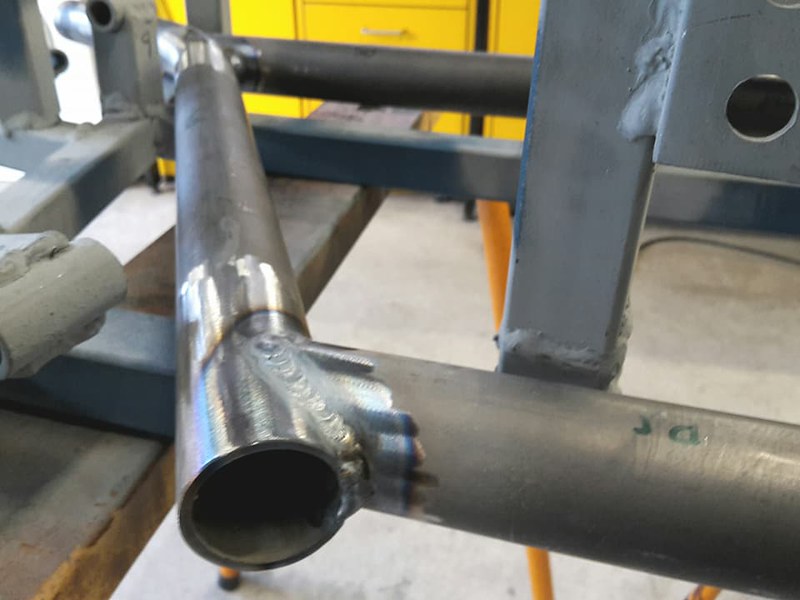 
|
|
|
|
|
04-01-2018, 05:47 AM
|
#78 |
|
Senior Member
Join Date: Jul 2016
Drives: BRZ, WRX
Location: Sydney, Australia
Posts: 292
Thanks: 105
Thanked 970 Times in 234 Posts
Mentioned: 2 Post(s)
|
Back on it today, things are going well.
Started by aligning the base layer in the perfect position in the jig so everything is where I want it. Then got some clamps on it to lock it down whilst I got to work making some tabs for the trailing arm attachment points. Using some CAD to make the tabs. 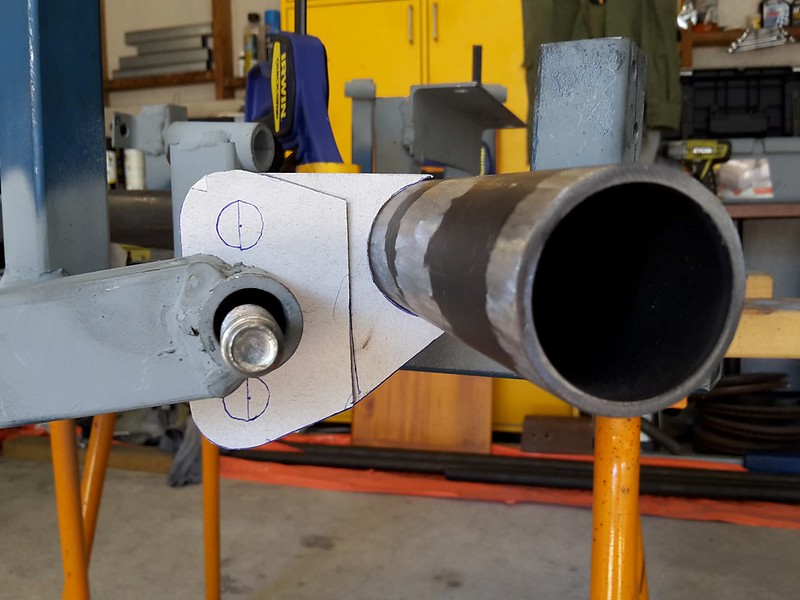 Transfer the CAD to 3mm steel then drill and cut to size four times. 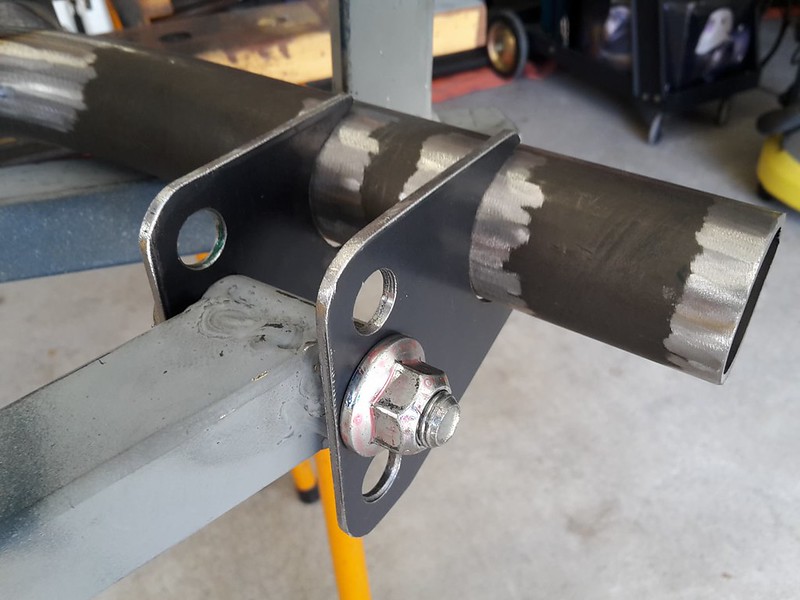 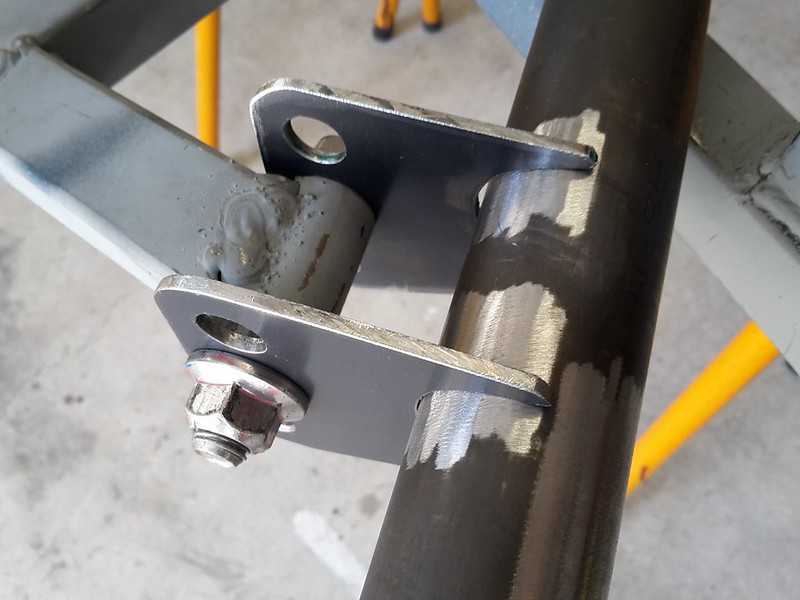 Then weld all four of them onto the base layer. 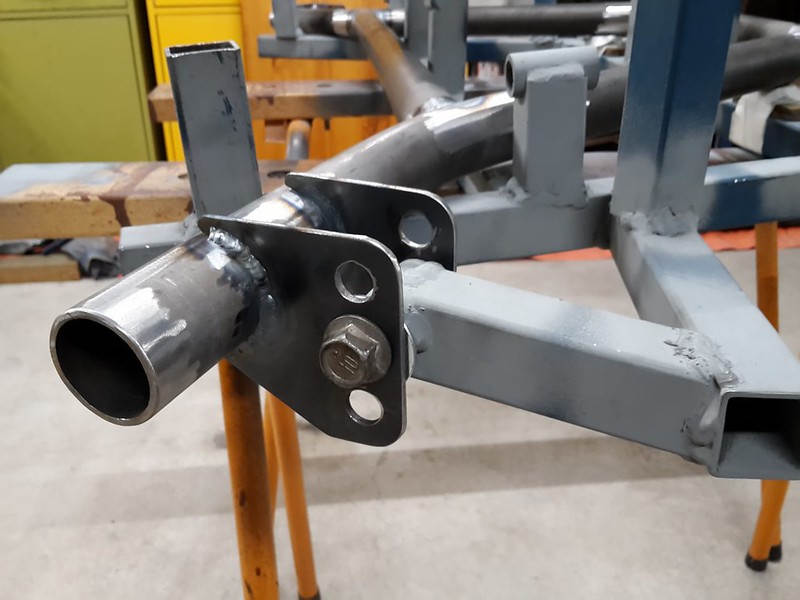 Now with these tabs on the base layer is locked in position giving a solid foundation for the rest of the suspension cradle. 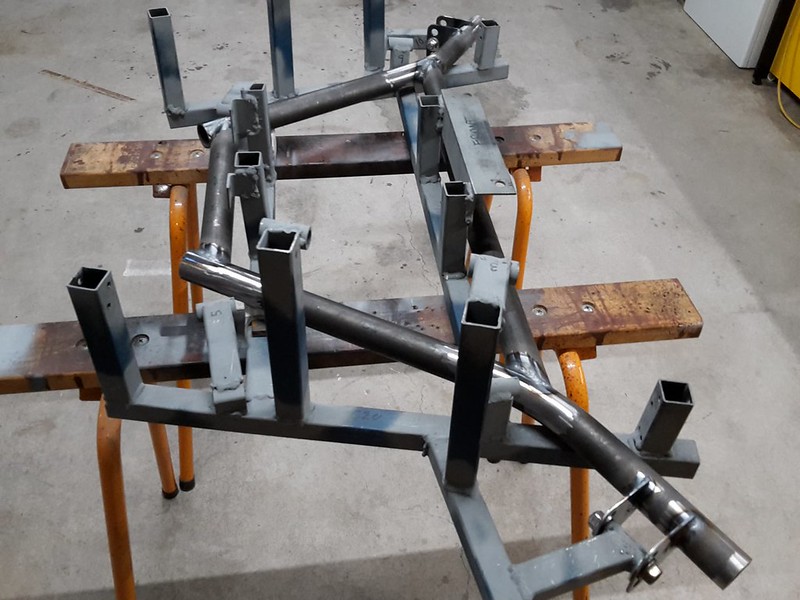 Sounds easy but it took me all day to get that done. |
|
|
|
|
04-02-2018, 05:04 AM
|
#79 |
|
Senior Member
Join Date: Jul 2016
Drives: BRZ, WRX
Location: Sydney, Australia
Posts: 292
Thanks: 105
Thanked 970 Times in 234 Posts
Mentioned: 2 Post(s)
|
Last day of the long weekend and I managed to get a couple of hours in the garage.
I only had time to make two more tabs, these are for the rear lower control arm attachment points. 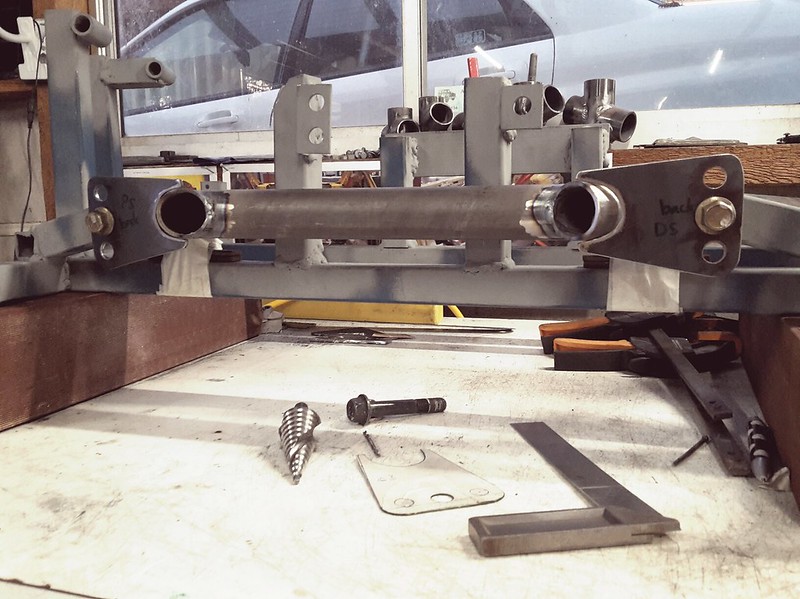 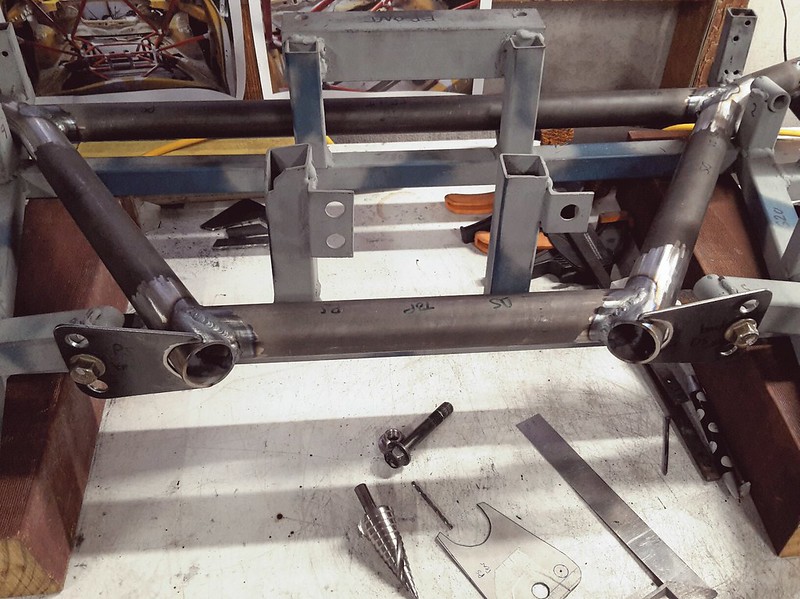 They will need a small corner gusset sitting horizontal on the inside just because the distance between the tube and bolt is pretty long. |
|
|
|
|
04-08-2018, 05:35 AM
|
#80 |
|
Senior Member
Join Date: Jul 2016
Drives: BRZ, WRX
Location: Sydney, Australia
Posts: 292
Thanks: 105
Thanked 970 Times in 234 Posts
Mentioned: 2 Post(s)
|
Today I started working on the upper level of the rear suspension. The upper level is simpler as the attachment points are in a straight line allowing me to run the tube parallel to them. This meant that unlike the base level all the tabs will be exactly the same as each other.
I pretty much had a production line going as I needed to make eight identical tabs. 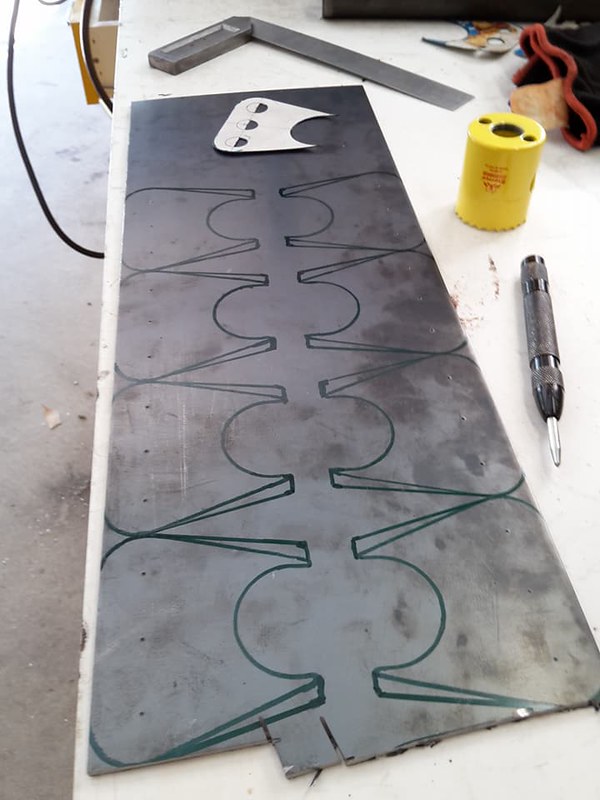 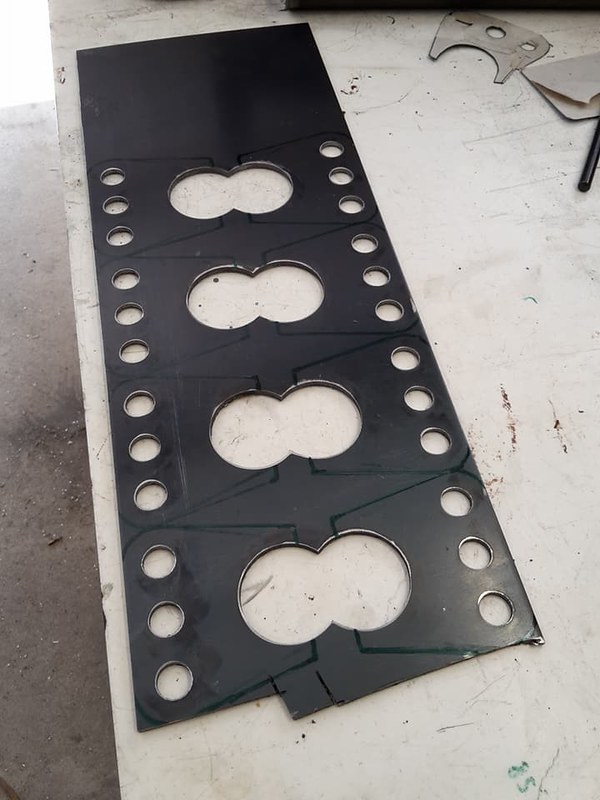 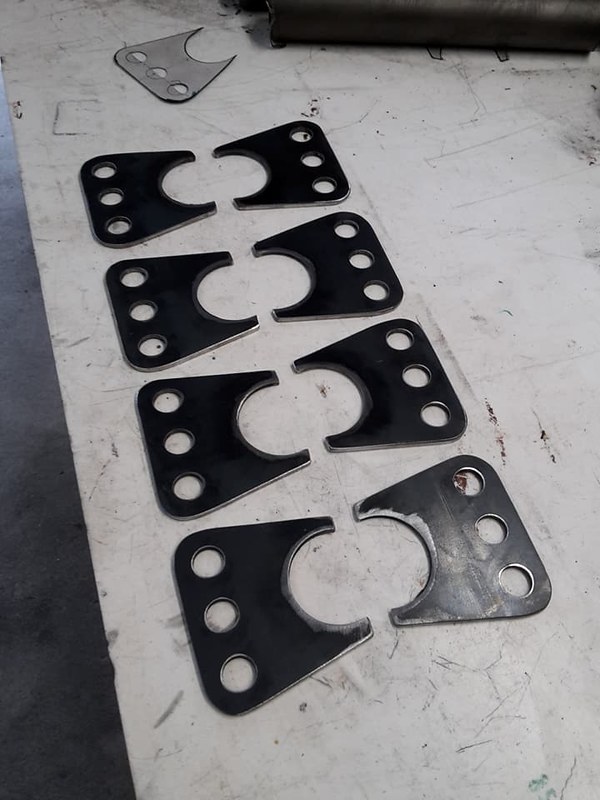 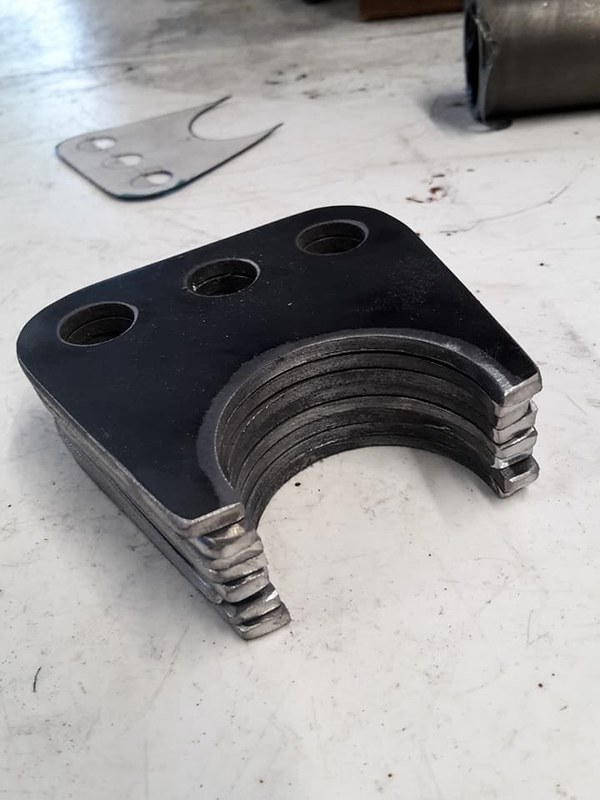 It was a repetitive job and a bit tedious but much quicker than making one off tabs. I then cut two tubes for the upper level before running out of time once again. 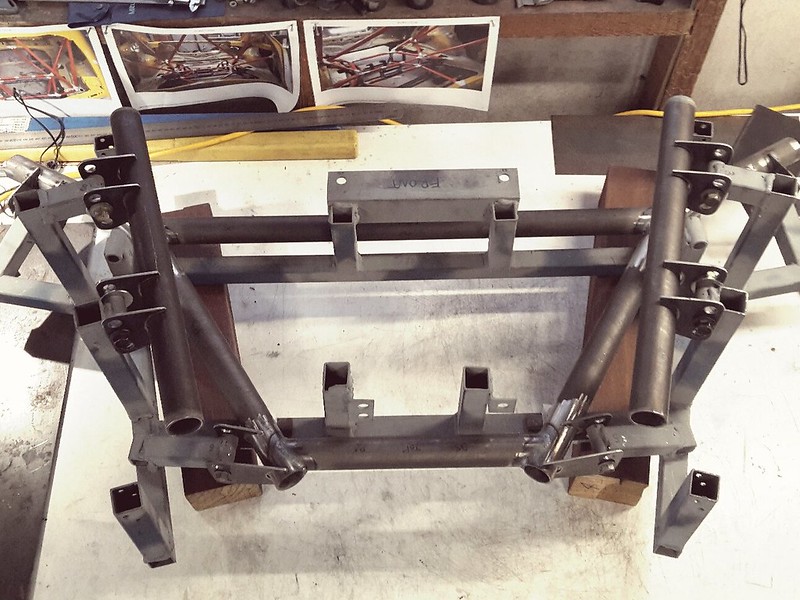 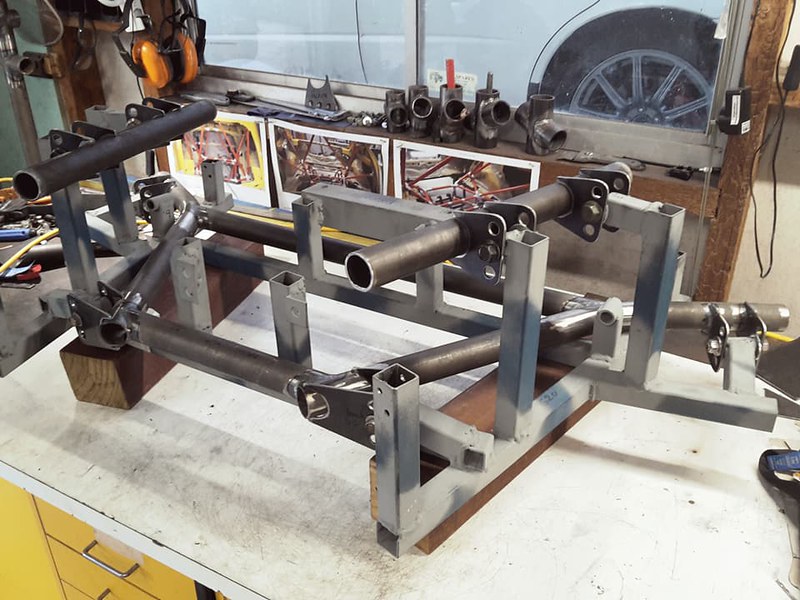 That's all for now. |
|
|
|
|
04-08-2018, 11:30 AM
|
#81 |
|
Member
Join Date: Nov 2015
Drives: 2018 BRZ tS
Location: Planet earth
Posts: 44
Thanks: 3
Thanked 33 Times in 17 Posts
Mentioned: 0 Post(s)
|
Wow, thats great work!
|
|
|
|
|
04-11-2018, 05:49 AM
|
#82 |
|
Senior Member
Join Date: Jul 2016
Drives: BRZ, WRX
Location: Sydney, Australia
Posts: 292
Thanks: 105
Thanked 970 Times in 234 Posts
Mentioned: 2 Post(s)
|
Today I have finally finished making all the tabs, all 20 of them! it has been very time consuming.
They are not welded on yet but they are prepped to be welded so hopefully on the weekend I'll get it done. 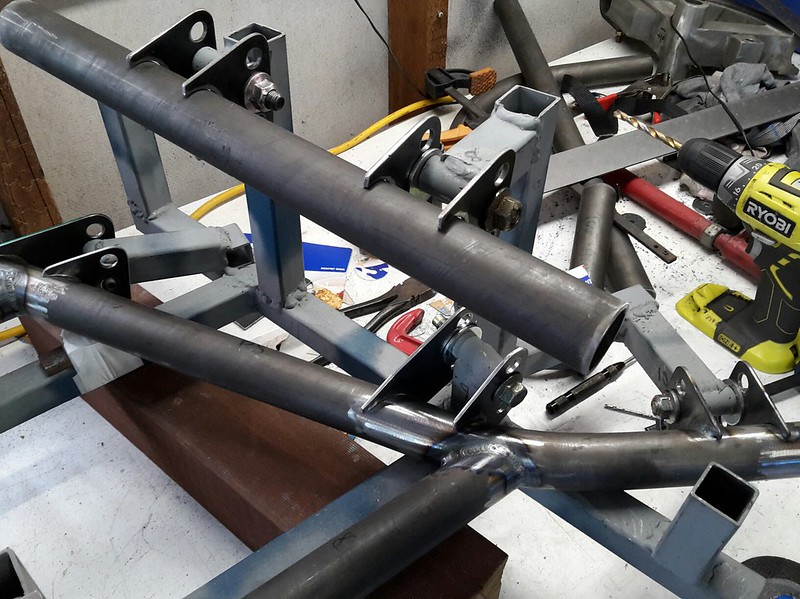 The tabs I made today are for the toe arms and I ran into a bit of a problem. You can see in the photo there is not much space for the nut if I'm using the lower mounting position. I am thinking I can fix this by welding a lower profile nut permanently over the lower hole, I'll update you all once I have come up with a solution. 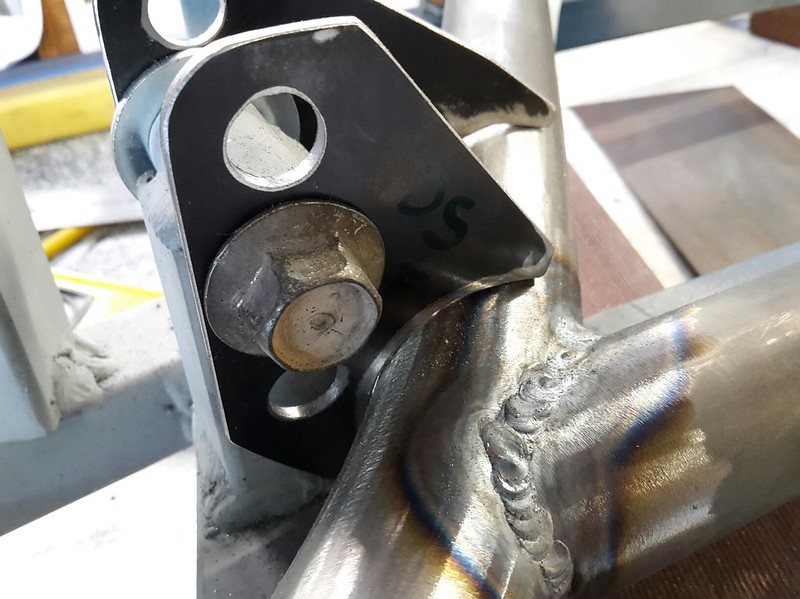 Speaking of the holes in the tabs, the lower position gives stock suspension geometry at 21mm of lowering, the middle position at 44mm and the top position at 67mm of lowering. Now someone I trust with suspension told me that the geometry on these cars is best at about 20mm of lowering from stock ride height. Which means I can have this "best" geometry at 41mm, 64mm or 87mm of lowering. I hope that made sense 
|
|
|
|
|
04-15-2018, 07:42 AM
|
#83 |
|
Senior Member
Join Date: Jul 2016
Drives: BRZ, WRX
Location: Sydney, Australia
Posts: 292
Thanks: 105
Thanked 970 Times in 234 Posts
Mentioned: 2 Post(s)
|
A little more work done today on the rear suspension.
A friend of mine turned down a couple of the factory nuts on his lathe so I would weld them into position. This was just done because of a clearance issue with the tube as mentioned previously. 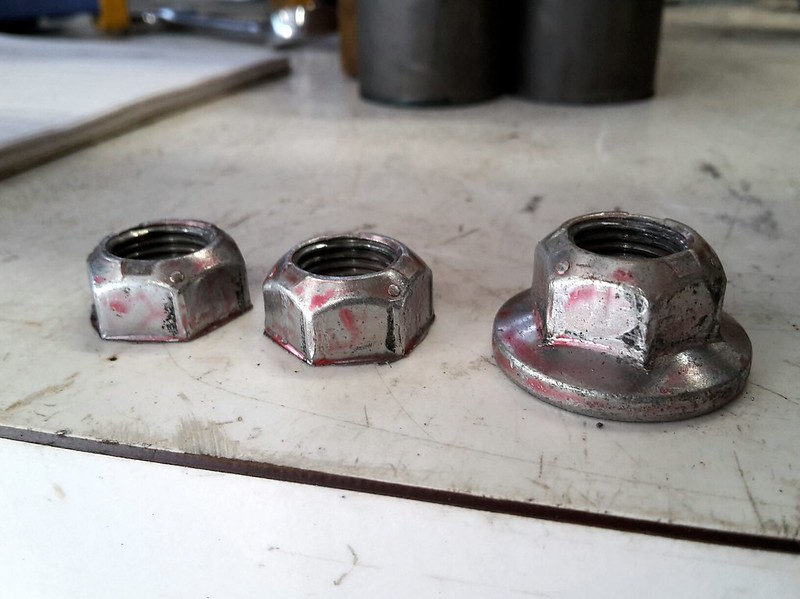 So I welded the nuts into position before welding the tabs to the tube. I may never end up using that lower hole but I went to a lot of trouble to make those tabs so I wanted to be sure I could use them if needed. The bolt will need to be trimmed down to the exact length too. 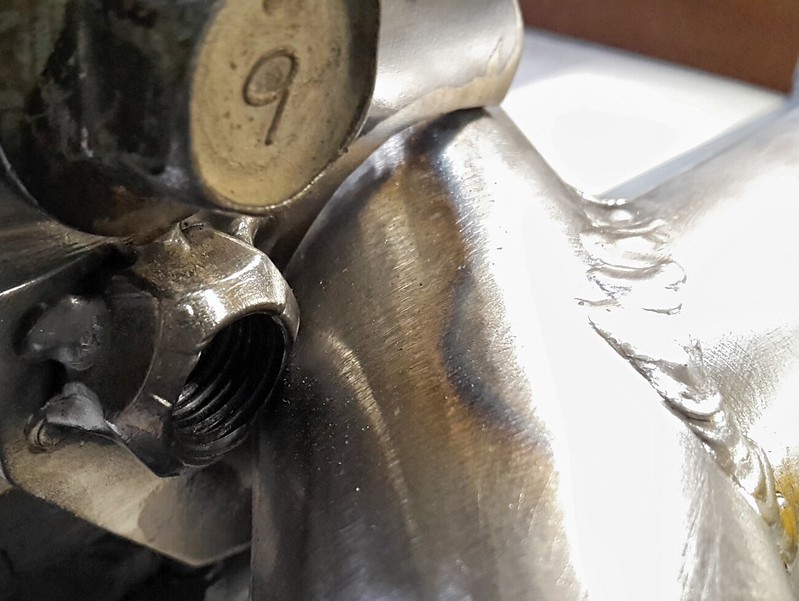 Next job was welding all the tabs onto the upper level of tubes. 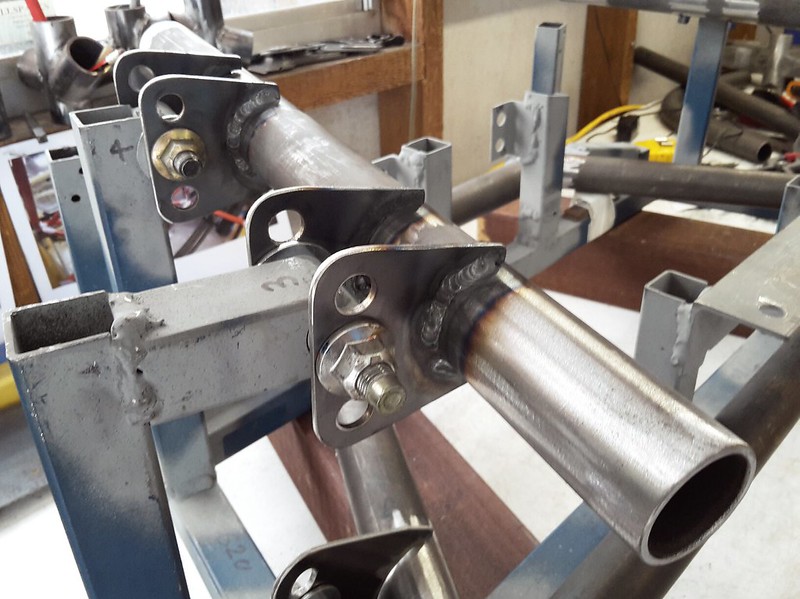 Final job for the day was welding on the tabs for the toe arms. I could not fully weld these as they are too close to the jig but I should be able to remove the jig and finish the welds before putting it into the rear of the car. 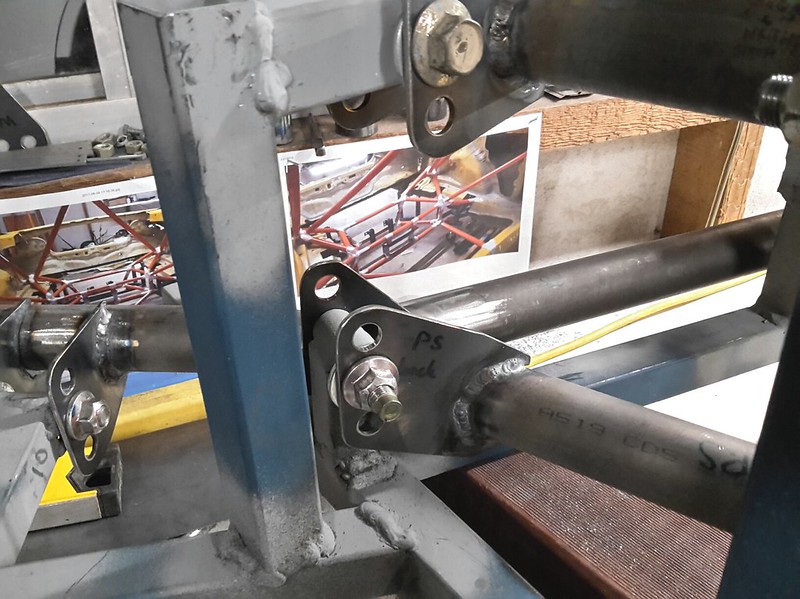
|
|
|
|
|
04-16-2018, 02:29 AM
|
#84 |
|
Driver

Join Date: Sep 2013
Drives: 16 Subaru BRZ
Location: San Diego, CA
Posts: 188
Thanks: 35
Thanked 46 Times in 42 Posts
Mentioned: 0 Post(s)
|
nicely coming along, keep us updated
__________________
BRZ Build Thread
See you space cowboy... |
|
|
|
|
|
|
|
|
|





